Export Tool
You can set up automated export from ONEcount to an FTP or SFTP site using the Export Tool. Export Jobs are scheduled by the system and run every hour. Jobs run in parallel and can take from a few minutes to several hours to complete. You can enter an e-mail address into your job. If you do, an e-mail will be sent to the e-mail address when your job completes, including relevant information about errors, problems with the job, etc.
To start, choose Export Tool under Utilities on the Data Management Menu. You will see a list of export jobs that are already in the system. Click Create New Export job in the upper-right corner to create a new export job:

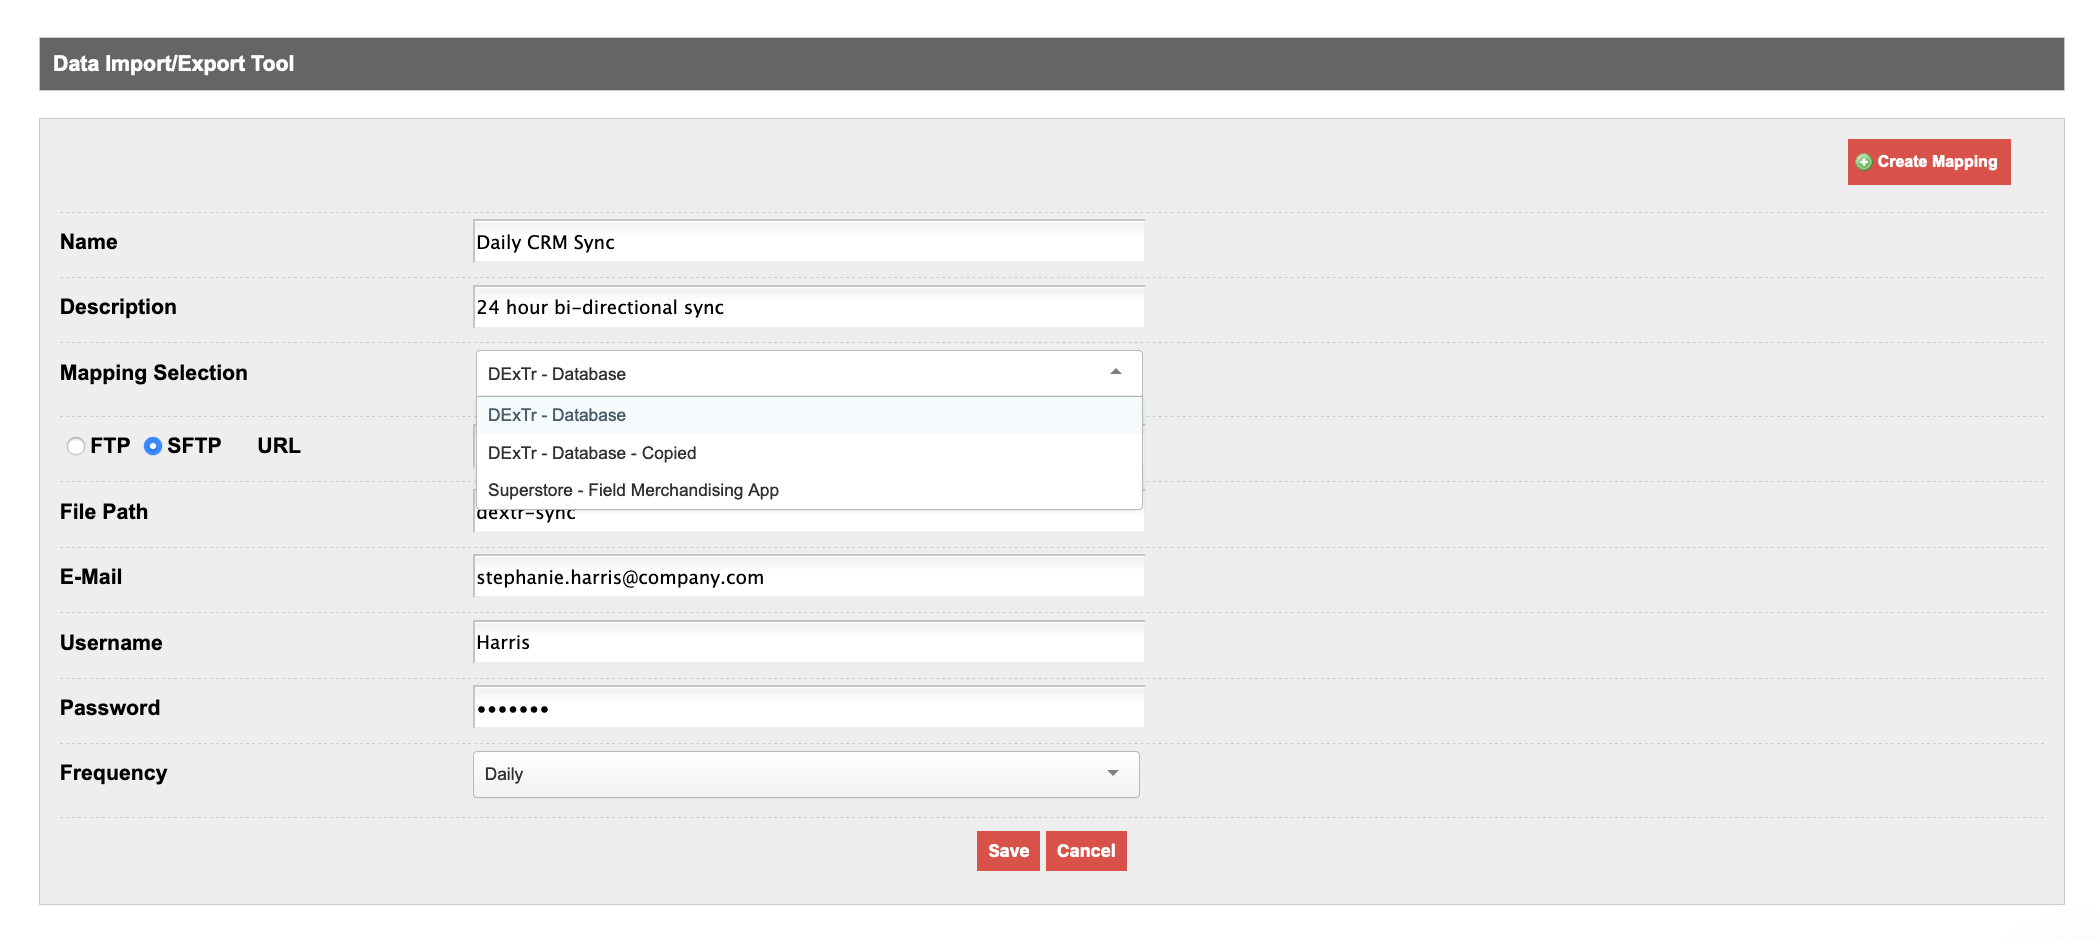
Now you'll create your export job. First, give the job a name and a brief description. Next, choose which DExTr mapping you will apply to this export. These are the mappings you created in the DExTr tool, also under Data Management.
Export Types:
ONEcount offers multiple types of data exports. Choosing a data type will present you with export options specific to that export type. The simplest type of export is the User Export. This exports user demographic data from the system. This option will export data for ALL users in the system:

Another type of export is Transaction Export. This option allows you to export data relating to product or package transactions that have been recorded in ONEcount. You may choose product OR package export, and you can choose the specific source code, product or package TERM that you would like exported. Please note that all of these options are limiting options. To export all transactions, leave the product, TERM and source code options blank.
Examples: To export all transactions used by a specific source code or codes, enter the codes you would like exported and leave the product/TERM options blank. To export all transactions for a product or TERM, choose the product(s) or TERM(s) and leave the source code field blank. Remember, these options are limiting options.

The third type of export is an E-Mail Engagement Export. With this option you can export e-newsletter engagement data from the system. When you choose e-mail export, you will need to pick the e-mail vendor for this export (the pull-down will show all of the e-mail systems that are configured for your system). Then you can select the newsletter list(s) or specific campaign(s) that you would like exported. Again these fields are limiting fields, so if you want to export e-mail engagement for all campaigns across all lists for a vendor, leave these fields blank.

Another type of export is Web Engagement Export. This exports web engagement data for all users across the entire ecosystem. There are no limiters for this export other than the date range export at the bottom of the screen.

The final type of export is Banner Engagement Export. This screen allows you to export banner data that has been collected by ONEcount. The options here are limiter options, meaning if you choose an option, the export is limited to the engagement for that option. For example, to export only engagement for a specific advertiser, choose an advertiser from the Advertiser list. To export only a certain campaign from that advertiser, enter the campaign(s). To limit the output to users who were acquired (subscribed) through a specific source code, enter that source code into the box.
For example, to export all impression and click data for Angel Oak's Q1 2022 campaign, select Angel Oak as the advertiser and then choose the specific campaign you are interested in. If you would like to only report banner activities from users who were either part of an advertiser List Match or that were part of a specific product or segment, add the Source Code for that List Match in the Source Code box and the only activity that will be exported will be that of users who have that source code in their transaction history.ff

Now choose whether the file should be accessed via FTP, SFTP, or URL. We recommend using SFTP or an HTTPS URL, since most imports involve some sort of PII. You will need to enter the full file path to your file, including the file name.
For example, if you are importing a file called CRM-data.csv, and your file is on an SFTP site and it is in the /files/outgoing/, then in the File Path field you would enter: /files/outgoing/CRM-data.csv.
For repeat imports, some customers use a naming convention with a date place-holder in it. The macro is identified by a pair of %% markers on each end. It's definition is:
YYYY – four-digit year
YY – two-digit year
MM – two-digit month
DD – two-digit date
Using this placeholder, you can specify files such as the following:
file-%%MMYY%%.csv or file-%%MMDDYYYY%%.csv
Please note that when using a date placeholder, ONEcount will only import a file if the date is today's date.
When using a dated naming convention, ONEcount will import files only with a matching date. In other words, if the file name is file-12252019.csv, ONEcount will only import that file on December 25, 2019. On the other hand, if the file name is file-%%MMYY%%.csv, it will import a file named file-1219.csv every day in December 2019.
After the file name, enter the e-mail address that you would like to receive a summary of the import process. You can enter a comma-separated list of addresses.
Next enter the FTP/SFTP/URL login credentials required by the remote system. ONEcount will use these credentials to fetch your file and import it.
Finally, choose the frequency for this import. Available options are Daily, Monthly, One-Time or Weekly, and the date range you would like exported. This allows you to set up a feed of data to your advertisers or partners that include data from the last N days, etc.
When you are done, hit Save and your Import Job will be saved into the system. It will run the next time ONEcount scans your queue for jobs, and you'll receive an e-mail notifying you when the job is completed.
Note on Source Code Handling in Export
For export transaction types, the source code is determined as follows:
- Mapped Source Code in DExTr Mapper
- If a source code is mapped in the DExTr mapper, the system will export and add the source code based on that mapping.
- No Mapping, but Source Code Field Present
- If no source code is mapped, but the source code field is included in the mapper:
- The export job will check if there is any parent source code and add to file.
- If the source code does not already exist in mapper or not in parent then source code id is added to file.
- If no source code is mapped, but the source code field is included in the mapper:
Note on Promo Code Handling in Export
For export transaction types, the promo code is determined as follows:
- Mapped Promo Code in DExTr Mapper
- If a promo code is mapped in the DExTr mapper, the system will export and add the promo code based on that mapping.
- No Mapping, but Promo Code Field Present
- If no promo code is mapped, but the promo code field is included in the mapper:
- The export job will add the promo code id to the file.
- If there is no promo code for that transaction then empty field is added to file.
- If no promo code is mapped, but the promo code field is included in the mapper:
Tags: