Global Features
The following lesson describes global attributes of ONEcount that aid in navigation, functionality, and explanation of features.
GLOBAL FEATURES
The hints below apply to global features, i.e. features that can be found in any/all of the ONEcount modules.
Use the Search functionality on listing pages to find things quickly.
You'll find search functionality at the top of all pages that contain a list of items-- e.g. Manage Products, Manage Forms, Saved Lists, etc.
Simply enter your search term, sort by title or ID number, put in ascending or descending order, set the number of rows to appear in the results, and click "Apply". To reset, click "Reset".
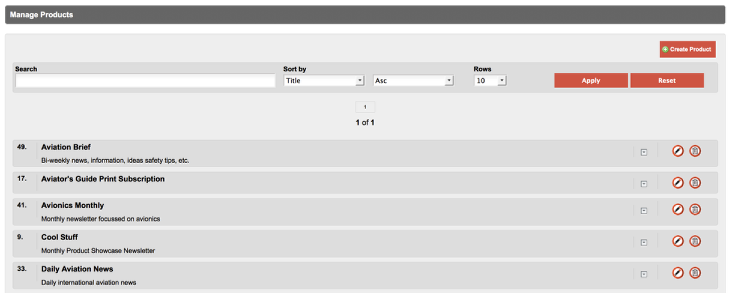
In Image 1 below, the search term is "aviation", sorted in ascending order by title, with a 10 row/item display.
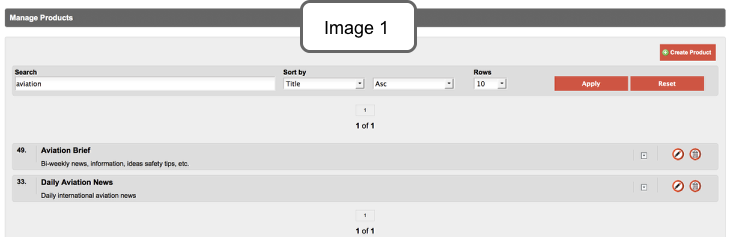
In Image 2 below, the search is the same except that the sort has been changed to Sort by: ID rather than title.
Use the Rich Text Editor function to style description fields in forms, personas, etc.

All features in the INVENTORY module and the PERSONA MANAGER module that contain description fields allow you to style those fields using a pop-up rich text editing menu. See features oulined below:
1 – Undo and Redo
2 – Bold, Italic, Underline
3 – Find, Find and Replace
4 – Link and Unlink
5 – Text Color and Background Color
6 – Add Image, Smiley, Special Character
Use the "expand" icon to quickly view details of items.

Wherever you see the above, you can click on it to expand the item to see more details.
For example, Image 1 is a product without details expanded, and Image 2 shows the expanded product.


Use the quick date range options on the date range calendar, and no matter how you select the range, always be sure to APPLY.

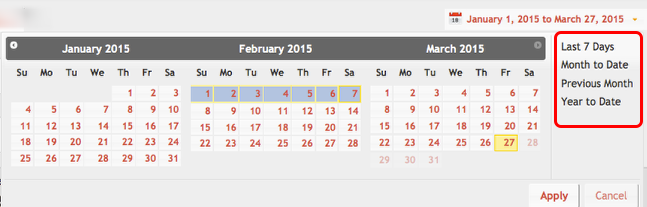
You'll find a date range calendar at the top right of Analytics and Dashboard pages, as shown above.
Clicking on the date range will open a drop-down calendar, as shown below.
You can select any date range by clicking on the start date and the end date, or you can select from the quick options the right of the calendar drop-down: Last 7 Days, Month to Date, Previous Month, Year to Date.
A selected date range will appear highlighted in gray. Once you have your date range selected, click "Apply", and that date range will be applied to the analytics you select to run.
Know global icons; and if you don't know what one is, hover over it for an explanation.
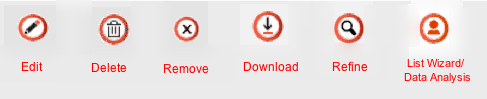
If you hover over any icon a pop-up explanation of that icon's function will appear.

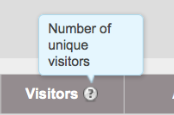
Clicking on a " ? " in any table column heading will bring up a pop-up explaining the heading label. (See example below.)
Search all Documentation:
Unknown macro: livesearch. Click on this message for details.
Search System and Setup Information:
Unknown macro: pagetreesearch. Click on this message for details.
More System and Setup Information