

How-To: Filing AAM Reports
How to File an AAM Publisher's Statement
Period-end workflow: audit reports, assembly, reconciliation, and filing
1. Overview
This guide walks through the complete process of assembling and filing an AAM Publisher's Statement using the ONEcount Fulfillment module. It covers running the required period-end audit reports, assembling them into a Publisher's Statement via RPT-11, reconciling the numbers, and submitting the filing to the Alliance for Audited Media.
The intended audience is circulation managers and audit/compliance staff who are responsible for periodic AAM filings. A typical filing session takes two to four hours, assuming all issues in the reporting period have already been closed through RPT-19.
This guide assumes you are familiar with the basic ONEcount Fulfillment workflow: creating issues from saved lists, running reports, and closing issues. If you are new to the module, read the Fulfillment User Guide first.
2. Before You Start
Complete the following checklist before beginning the filing workflow. Every item must be satisfied; skipping any of them will cause validation failures in RPT-11.
- All issues in the reporting period must be finalized. This means RPT-19 (Issue Close) has been run and completed for every issue whose issue_date falls within the period's start and end dates. Check the Issues list for any issue still in planned, open, or locked status.
- RPT-14 (Qualification Age Risk) must pass cleanly for the period. RPT-14 identifies subscribers whose qualification has expired or will expire within the period. Any flagged records must be resolved (requalified, removed, or reclassified) before RPT-11 will accept the data.
- The publication's audit_bureau field must be set to either AAM_consumer or AAM_business. If it is set to 'none', RPT-11 will not be available.
- A reporting period must exist for the publication with the correct start and end dates. The period's status must be open or closing.
- Your user account must have both the fulfillment.run and fulfillment.statement_file permissions. Without statement_file, you can run the component reports but cannot finalize the Publisher's Statement.
3. Run the Period-End Audit Reports
Before assembling the Publisher's Statement, run each of the component reports in the order listed below. This order is recommended because later reports depend on data validated by earlier ones. Navigate to Fulfillment, then Reports, and select each report in turn.
3.1 RPT-12: Rate Base Compliance
Run this first for paid publications. RPT-12 compares total paid circulation for each issue against the declared rate base. It flags any issues where paid circulation falls below the rate base and calculates the shortfall percentage. If the publication does not declare a rate base, skip this report.
3.2 RPT-14: Qualification Age Risk
This report is mandatory and must pass before RPT-11 will proceed. RPT-14 identifies controlled subscribers whose qualification date is older than the allowed window (typically 36 months for AAM Business). Any flagged subscribers must be requalified or removed from the serve list before filing.
3.3 RPT-02: Average Circulation Summary
RPT-02 calculates the average total and average net paid (or qualified) circulation across all non-special issues in the period. These averages are the headline numbers in the Publisher's Statement. Review them for reasonableness before proceeding.
3.4 RPT-01: Circulation by Issue
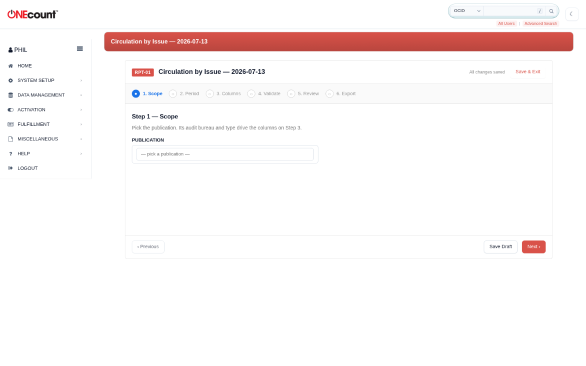
RPT-01 breaks down circulation issue by issue, showing paid, controlled, and total for each. Use this report to spot outliers or data quality issues in individual issues. The totals across all issues should reconcile with RPT-02.
3.5 RPT-03: Average Subscription Price
For paid publications only. RPT-03 computes the weighted average price paid by subscribers, broken down by subscription channel and term length. This is required for the paid circulation analysis section of the Publisher's Statement.
3.6 RPT-04: Geographic Distribution
RPT-04 distributes circulation by state (domestic) and country (international). It uses the publication's domestic country set to determine the boundary. The geographic distribution feeds Paragraph 7 of the Publisher's Statement.
3.7 RPT-05: Demographic Cross-Tab
For AAM Business publications only. RPT-05 cross-tabulates the subscriber base by business type and job function using the demographic question IDs configured on the publication. This populates the demographic analysis section of the Statement.
3.8 RPT-06: Qualification Source & Age
For AAM Business publications only. RPT-06 breaks down the qualified (controlled) circulation by the source of qualification (direct request, association membership, etc.) and the age of qualification in months. This feeds the qualification analysis section of the Statement.
3.9 RPT-07: Subscription Channel Analysis
For paid publications only. RPT-07 analyzes paid subscriptions by acquisition channel (direct mail, online, agent, etc.) and shows trends across the period. This is supplementary data for the paid circulation analysis.
3.10 RPT-08: Renewal Rate
For paid publications only. RPT-08 calculates the subscription renewal rate for the period by comparing renewals received against subscriptions expiring. A healthy renewal rate supports the sustainability narrative in the Statement.
4. RPT-11: Publisher's Statement — Step by Step
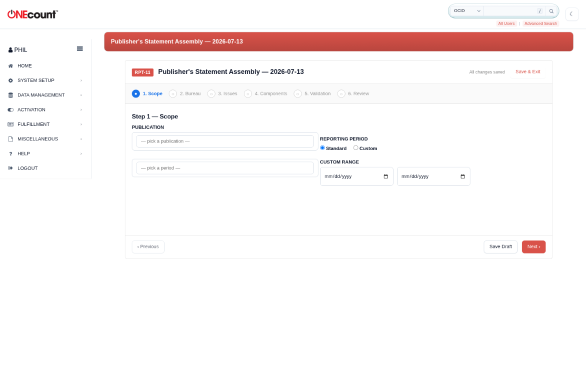
RPT-11 is a six-step wizard that assembles the component reports into a complete Publisher's Statement. Navigate to Fulfillment, then Reports, then RPT-11 Publisher's Statement.
Step 1: Scope
Select the publication and reporting period for this Statement. The wizard displays the period's date range and the number of issues that fall within it. Verify that the issue count matches your expectations. If issues are missing, return to the Issues list and check their dates. Click Next to proceed.
Step 2: Bureau
Confirm the audit bureau (AAM Consumer or AAM Business). This determines which sections of the Statement are required and which validation rules apply. The bureau is pulled from the publication record; if it is incorrect, cancel the wizard and update the publication in Setup before restarting. Click Next to proceed.
Step 3: Issues
Review the list of issues included in this Statement. Each issue shows its status, issue date, mail date, and whether it has been flagged as the audit issue or analyzed issue. All issues must be in finalized status. If any issue is not finalized, the wizard will display a warning and you must go back to complete RPT-19 for that issue before continuing. Designate the audit and analyzed issues here if you have not already done so. Click Next to proceed.
Step 4: Components
This step displays each component report and its status. Green indicates the report has been run and its data is current. Yellow indicates the report was run but the underlying data has changed since (e.g., an issue was re-closed). Red indicates the report has not been run. You can re-run any component report from this screen by clicking the refresh icon next to it. All required components must be green before you can proceed. RPT-14 must show a clean pass. Click Next when all components are green.
Step 5: Validation
The wizard runs a set of cross-checks across all component reports. These include verifying that RPT-02 averages match the RPT-01 issue-level data, that RPT-04 geographic totals match RPT-01 totals, that RPT-08 renewal rates are within reasonable bounds, and that no data gaps exist. Each validation check is listed with a pass/fail indicator and, for failures, a description of what is wrong and how to fix it. You cannot proceed until all checks pass. Fix any issues by returning to Step 4 and re-running the affected component reports, then come back to Step 5.
Step 6: Review & Export
The final step displays a complete preview of the Publisher's Statement as it will be filed. Review every section carefully. The export options are:
- PDF: a formatted Publisher's Statement document suitable for printing or archiving.
- XLSX: the full data in spreadsheet format for internal analysis.
- JSON: machine-readable format for integration with other systems.
- Bundle (ZIP): all artifacts from all component reports plus the Statement itself, packaged for upload to the AAM portal.
Click Finalize to lock the Statement. Once finalized, the reporting period status changes to filed and all data becomes read-only. This action requires the statement_file permission.
5. Reconciliation
Before finalizing the Statement, perform the following reconciliation checks manually. While RPT-11 Step 5 runs automated validations, these additional checks catch issues that automated rules may miss.
5.1 RPT-02 vs. RPT-01
The average total circulation in RPT-02 should equal the simple average of the per-issue totals in RPT-01 (excluding special issues). If these do not match, it usually means an issue was re-closed after RPT-02 was last run. Re-run RPT-02 from RPT-11 Step 4.
5.2 RPT-04 vs. RPT-01
The sum of all geographic segments in RPT-04 should equal the total circulation for the analyzed issue in RPT-01. A mismatch usually indicates that some subscribers have missing or invalid country codes. Check the analyzed issue's serve list for records with blank countries.
5.3 RPT-08 Renewal Rate Sanity
Review the renewal rate in RPT-08. Rates below 30% or above 95% are unusual and may indicate data quality issues (e.g., renewals not being recorded against the correct Resource, or term lengths being misconfigured). Investigate before filing.
5.4 Fixing Issues
If any reconciliation check fails, return to RPT-11 Step 4, re-run the affected component report, then advance back to Step 5 to re-validate. You do not need to restart the entire wizard; simply navigate backward and forward within the steps.
6. Submitting to AAM
After finalizing the Statement in RPT-11, follow these steps to submit it to the Alliance for Audited Media.
- Download the bundle ZIP file from RPT-11 Step 6. This file contains all required documents and data files.
- Log in to the AAM publisher portal at auditedmedia.com.
- Navigate to the Statements section and click Submit New Statement.
- Select the publication and reporting period that matches your filing.
- Upload the bundle ZIP file.
- Attach any supplementary documentation required by AAM (e.g., rate cards, advertising affidavits, ownership change notices).
- Review the submission summary and click Submit.
- Wait for the confirmation email from AAM. This typically arrives within one business day and contains a confirmation ID.
- Return to ONEcount and navigate to the reporting period in Fulfillment, then Setup, then Reporting Periods. Enter the AAM confirmation ID in the confirmation_id field. This creates a permanent link between the ONEcount filing record and the AAM submission.
7. After Filing
7.1 Read-Only Period
Once a reporting period is filed, it becomes read-only. No reports can be re-run, no issues can be modified, and no artifacts can be regenerated. This preserves the integrity of the filed data for audit purposes.
7.2 Reopening a Filed Period
If a correction is needed after filing, a user with both the setup and statement_file permissions can reopen the period. Navigate to Setup, then Reporting Periods, select the period, and click Reopen. The period status reverts to closing. You can then re-run the affected reports, re-assemble RPT-11, and re-file. Note that reopening does not withdraw the submission already made to AAM; you must contact AAM separately to request a correction or replacement filing.
7.3 Correction Flow
The recommended correction flow is: reopen the period, re-run only the affected component reports, re-assemble RPT-11, re-finalize, download the new bundle, and submit to AAM as a corrected statement. Note the correction in the AAM portal's comments field, referencing the original confirmation ID.
7.4 Archiving
All artifacts from a filed period remain available in ONEcount indefinitely. For additional archiving, download the bundle ZIP and store it in your organization's document management system. AAM requires publishers to retain filing records for seven years.
8. Troubleshooting
8.1 RPT-11 Step 3 Shows Unfinalized Issues
One or more issues in the period have not completed RPT-19. Go to the Issues list, identify the issues that are not in finalized status, and complete the issue close workflow for each one. Return to RPT-11 and restart from Step 3.
8.2 RPT-14 Fails with Expired Qualifications
Subscribers whose qualification has lapsed beyond the allowed window must be addressed. Options include sending requalification requests (if there is time before the filing deadline), removing the subscribers from the serve list, or reclassifying them as nonqualified. After making changes, re-run RPT-14 until it passes cleanly.
8.3 RPT-02 Averages Do Not Match RPT-01
This typically occurs when an issue was re-closed after RPT-02 was last computed. Re-run RPT-02 from RPT-11 Step 4. If the mismatch persists, check whether any issues are marked as special (is_special = 1) that should not be, or vice versa, as special issues are excluded from averages.
8.4 Geographic Totals Do Not Match Circulation Totals
RPT-04 totals should equal the analyzed issue's circulation total. If they do not, check for subscribers with missing or invalid country codes in the analyzed issue's serve list. Correct the address data, re-close the analyzed issue via RPT-19, and re-run RPT-04.
8.5 Statement Finalization Button Is Greyed Out
The Finalize button in RPT-11 Step 6 requires the statement_file permission. Verify that your user account has this permission under Fulfillment in the permission management screen. If you have the permission but the button is still greyed out, check that all Step 5 validations pass — the button is disabled until every validation check shows a green pass indicator.