Source Codes - How to Create and Manage Source Codes
Source Codes are used to track the source of a transaction, ie the source of the user/name in the ONEcount database. When assigned to a form, a source code can be used as a selection to track what form a user completed, i.e. the source of that name. They are also used when generating lists and reports, to track what list a user came from when importing users, or to show which e-mail campaign a user came from . (A source code tag can be appended to links in a newsletter campaign to override a source code assigned when a form is created, which allows you to identify that a user was directed to a form and came into the system from a link in that campaign.)
Source Codes are created in the Source Codes tool in the INVENTORY module, and this lesson describes how to create and manage them.
Please refer to Forms - How to Create a Form for directions on how to assign a Source Code to a form.
ONEcount Source Codes identify 1) the source of a name/transaction i.e. an online form, rented/purchased list, telemarketing campaign, newsletter campaign that a name and/or transaction comes from and 2) the source identifer, e.g. written direct request, telemarketing company request, etc.
These unique source codes allow you to use the List Wizard and audit reporting tools to pull lists and reports by name source.
You have the option of assigning levels to a source code: a "child" code and a "parent" code.
- In such instances, the "child" code identifies an individual source of the name/transaction and
- the "parent" code is the source identifier for all "child" codes subordinate to it.
- (For audited publications, this is the same concept as using a promo key/code and source identifier to identify the source of a name – i.e. promo key = the individual source a name/transaction came from and source identifier = telemarketing direct request, telemarketing company request, etc..)
For example:
To assign a child and parent source code to an online form:
- Create a "child/subordinate" code for the online form, e.g. OLFORM123.
- Create a "parent" code for the source identifier, e.g. Direct Request-Internet.
- When creating the form, assign the OLFORM123 source code, and all users who complete that form will have the OLFORM123 source code - and the "parent" Direct Request-Internet attached to their record in ONEcount.
- You can then use the Audit Report Tool to run a Source Breakdown-Paragraph 3b report to display "parent" (source identifier) totals only or a breakdown of "parent" and "child" (specific name source) totals.
To assign a source code to a data import of a renewal file from, e.g, a telemarketing campaign:
- Create a "child" code for the campaign, e.g. ABC123.
- Create a "parent" code for the source identifier, e.g. Direct Request-Telecomm.
- When importing the list, assign the ABC123 source code, and all records in that import will have the ABC123 source code - and the "parent" Direct Request-Telecomm attached to their record in ONEcount.
- You can then use the Audit Report Tool to run a Source Breakdown-Paragraph 3b report to display "parent" (source identifier) totals only or a breakdown of "parent" and "child" (specific name source) totals.
If you have a master file including multiple promo codes to identify various name sources, separate that file by promo code (i.e. create a sub-file for each ONEcount "child" source code that corresponds with each promo code) and import each sub-file using the appropriate "child" source code created in ONEcount.
See below for details on how to override a source code for, e.g. an online form, using a smartlink in a newsletter campaign. This allows you to identify all names/transactions who came to the online form as a result of a specific newsletter/email campaign.
NOTE THAT THE USE OF SOURCE CODES ISN'T LIMITED ONLY TO AUDITED PUBLICATIONS. UNIQUE SOURCE CODES SHOULD BE USED BY ALL ONECOUNT USERS FOR ALL ONLINE FORMS AND DATA IMPORTS TO IDENTIFY THE SOURCE OF EACH NAME/TRANSACTION.
OPENING THE "MANAGE SOURCE CODE" WINDOW
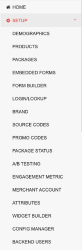
Select SETUP from the main menu.
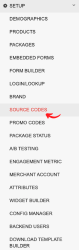
Select "Source Codes" from the sub-menu.
This will open the Manage Source Code window where you will see a table listing all existing source codes in alphabetical order and a link to create a new code. For each Source Code you will see the Source Code ID #, name, expand icon for codes with child (subordinate) codes, and icons to edit or delete code(s). (See below.)
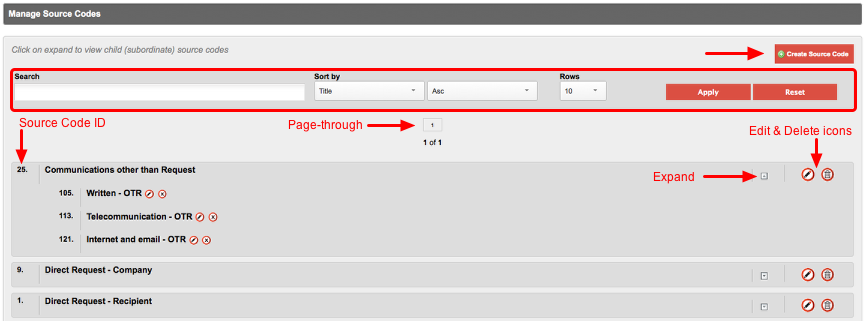
Note the page-through and search functionality.
Source Codes and Smartlinks:
Source Code ID #s can be used in smartlinks, and a source code ID appended to a smartlink will override a source code attached to a particular form.
For example:
- Form #15 has Source Code #24 attached to it, so that whenever a front-end user completes Form 15, Source Code 24 is also attached to that user's record. The source code indicates that particular transaction occurred through Form 15. A query can be run to pull a count of all users with source code 24, which is the count of how many users completed the form via the website.
- A promotional email campaign is sent out with the link to Form #15, and you wish to track how many people are accessing Form #15 as a result of that particular promotional email as opposed to accessing the form via the website.
- You would need to create a new source code to be appended to the link to Form #15 in the newsletter. Say the new source code's ID is 37.
- Appending the ID of 37 to the link to the form in the newsletter will override the source code 24, which is the original code attached to Form 15.
- Clicking on the smartlink in the email campaign will attach source code 37 to the user's record, and a query can be run to pull a count of all users with Source Code 37, which is the count of how many users completed the form after accessing it via the promotional email.
The format for appending a source code to the end of the URL is – &src_code=X where X is the Code ID. (e.g. &src_code=8)
CREATE A NEW SOURCE CODE
1. Click the "Create Source Code" button.
This will open the Manage Source Code window, as shown below.
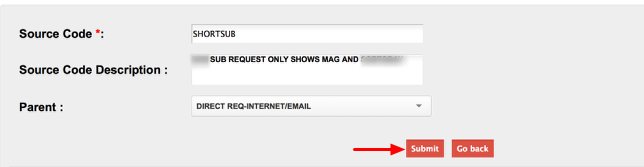
2. Enter a name and description for the code.
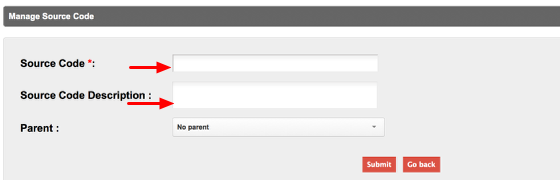
The red asterisk beside "Source Code" indicates the field is required. You will receive a notification to enter a code name if you leave this blank.
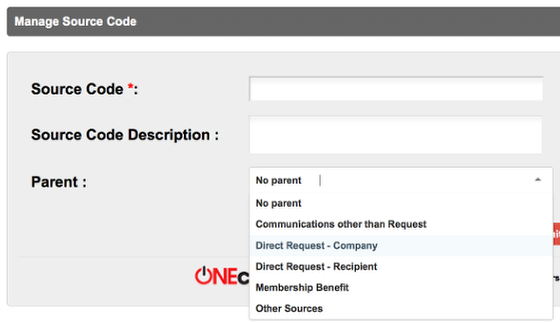
If the source code will have a parent code for audit purposes, select a parent code from the drop-down menu, as shown below. If the desired parent code isn't in the list, you'll need to create it.
3. Click the "Submit" button.
When you submit the code, you will receive a message, as shown below, indicating the code has been successfully added to the system.

To return to Manage Source Codes, hit the "Back" button in your browser twice or select INVENTORY then Source Codes from the menu. You will see the new code in the list.
EDIT A SOURCE CODE
1. Select the edit icon to the right of the code you wish to edit.


To return to Manage Source Codes, hit the "Back" button in your browser twice or select INVENTORY then Source Codes from the menu.
2. Change the name, description, and/or parent code as desired and click "Submit".
When you click "Submit", you will receive a message, as shown below, indicating the code has been successfully updated in the system.
Note that if the source code is a Parent code with Child codes associated with it, the Parent drop-down menu will indicate so with the wording "Already Has Child".
DELETE A SOURCE CODE
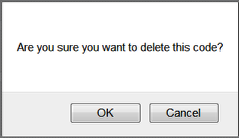
1. Select the trash can icon to the right of the code you wish to delete.

You will receive a confirmation message, as shown below, asking if you are sure you want to delete the code.
2. Click "OK" to delete the code, or "Cancel" to cancel the operation.
If you click "Cancel" you will be returned to the "Manage Source Codes" main window.
If you click "OK", you will receive a confirmation message indicating that the code has been successfully deleted. (See below.)

To return to Manage Source Codes, hit the "Back" button in your browser twice or select INVENTORY then Source Codes from the menu.
Search all Documentation:
Unknown macro: livesearch. Click on this message for details.
Search INVENTORY Documentation:
Unknown macro: pagetreesearch. Click on this message for details.
More INVENTORY Documentation: