Target users who have viewed X articles on your web site
Often you will want to target users who have visited your web site a certain number of times, or you may want to target users who have read a certain number of articles about a specific type of content. Both of these tactics are essentially the same action: create a segment of users who meet your criteria, then tie that segment to a specific action using the Target Manager. You can target users with a pop-up/interstitial message, a banner ad target through DFP, Revive or OpenX, an e-mail message to that user, or a redirect to another page or web form.
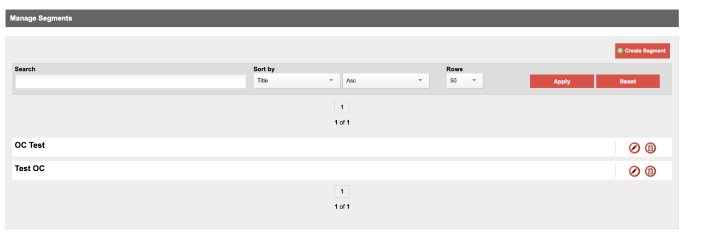
All of these start with defining your segment, so let's start there. From the ONEcount admin nav, choose Segment Manager, then from the secondary menu, Segment Manager again.

You will see a list of existing segments that have already been defined in the system. Click on Create Segment in the upper right-hand corner of the window to create a new segment.
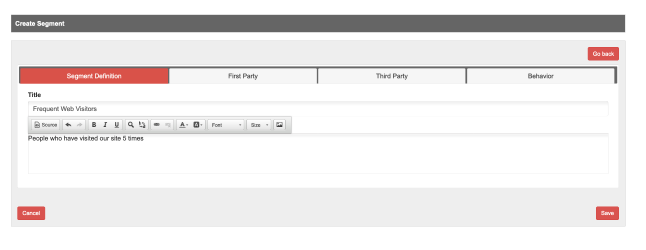
On the first tab, define your segment by giving it a title and a description. These elements are not customer-facing, so you can name them whatever makes sense to you.
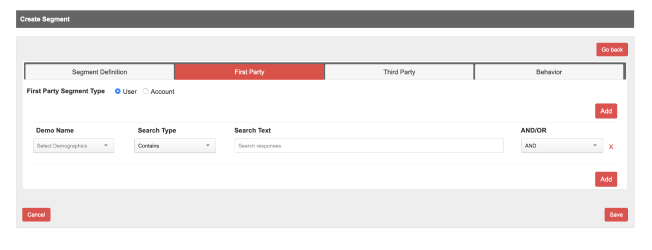
This segment is purely behavioral, meaning we are targeting people who have been to our site five times or read a certain type of content five times. Therefore we can ignore the First Party and Third Party tabs and click on the Behavior tab. However, if you want to ADD criteria to this segment, for example, visitors who read five articles on plumbing and have a job title of Building Manager, you would define those First Party criteria on this tab. In our example, we'll skip this.
On the behavior tab, choose the type of behavior you want to define this particular segment. For example, from the Category pull-down, we'll choose Web for web activity. There are several options under Sub Category that quantify the type of web activity, and we'll pick Viewed At Least. Enter the Target of the segment, in this case the domain name mysite.com, and then the Frequency of 5. In this case, any URL that contains mysite.com will match, so we're counting any page view on our site. Please note the Date Range–the defined behavior must take place during this date range. In other words, our example will match any person who visits our site and views at least five pages between June 24, 2020 and July 24,2020.
IMPORTANT NOTE: Double-check your SEGMENT date ranges and your ACTION date ranges. Most of the problems users have stem from not paying attention to the date ranges. In other words, the segment below is defined bast on PAST behavior, but the ACTION date range must start with today and be in the future. These are the default settings, but it you are testing segments over the course of several days or weeks, you may need to change the default ranges.
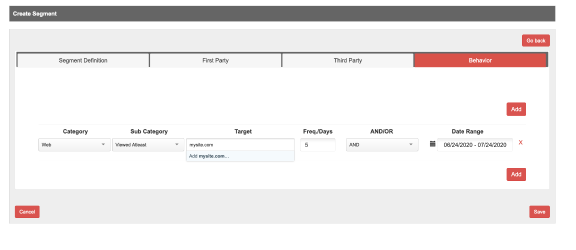
In this second example, we're not going to look simply at page visits but at a specific type of content. To do this, choose "Content" from the Category pull-down, Viewed At Least, and then in the target box, enter the content keywords you are planning to track. Frequency and date ranges are exactly the same as those above for web content.
I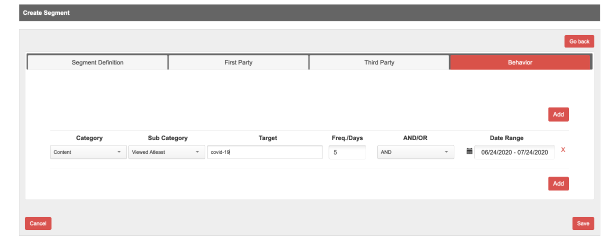
Click Save to save your segment. Now you need to create your Action, which is described here. Once you have an Action defined, tie the two together with the Target Manager, which is described here.