Utilities - Action Manager
The Target Engine, used in conjunction with the Action Manager, is a powerful tool that allows you to quickly and easily define audience segments and target them with specific actions, e.g. target specific ads, display a pop-up, send an email, redirect to another page or site.Audience segments are defined in the Target Engine, and the actions to take for those defined segments are defined in the Action Manager.The following lesson will provide details on how to create ad target, pop-up, email, and redirect actions to be used with defined audience segments.Please Note:Segments and targeting actions can be applied to both Known and Unknown users.If the defined criteria for a target segment doesn't require a user be known, e.g. viewing a particular webpage or section 3 times, as soon as a user meets that criteria by viewing the defined webpage or section 3 times, he/she is included in that segment (whether a known user or not) and the targeting action will occur.Also note that both users who fit the criteria for the defined segment as of the effective start date of an action and users who meet the criteria at any time during the effective date range will be targeted.|
OPEN THE ACTION MANAGER
Select UTILITIES from the main menu.
Select ACTION MANAGER from the sub-menu. This will open the Action Manager window displaying a list of existing actions, if any, as shown below.
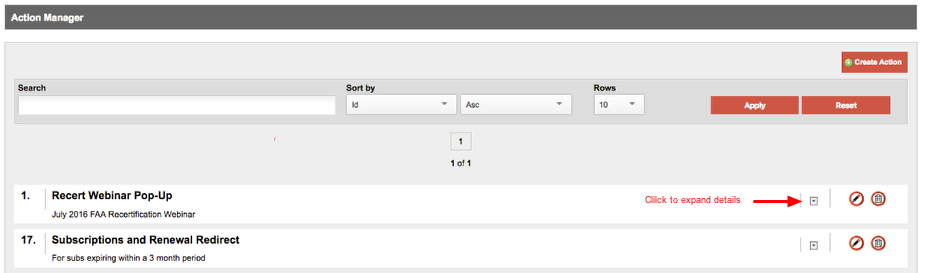
Expand the listed actions for details.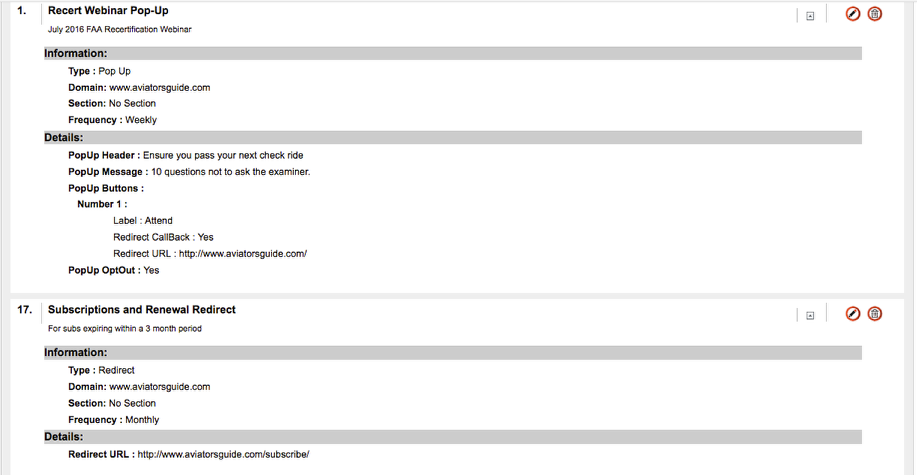 You can edit or delete an action using the icons to the far right of the listed action.
Note: After updating the action please make sure to re save the target/persona so the updates will be in effect.
Create a New Action
"Action" is where you define the action to be taken an identified segment, e.g. a website pop-up or ad targeting.Types of Actions include: Pop-Up, Redirect, Ad Target, Email
A. Create Pop-Up
1. Click "Create Action".
2. Give the action a name and description (optional).
3. Click "Next".
4. Complete the fields as shown below.
5. Click "Next".
Build Your Own Popup
"Build Your Own Popup" will display in a predefined basic styling.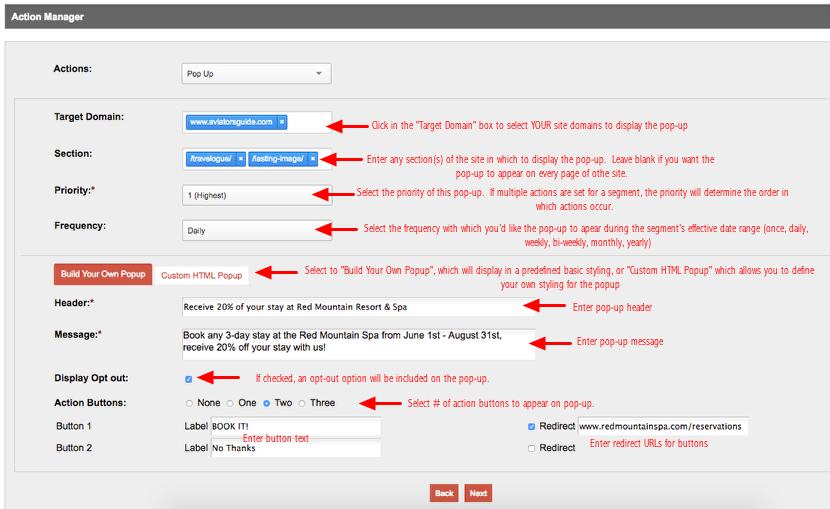
Custom HTML PopupAdd your own html to create a customized pop-up. All styling, text, buttons, etc. must be included in the html. 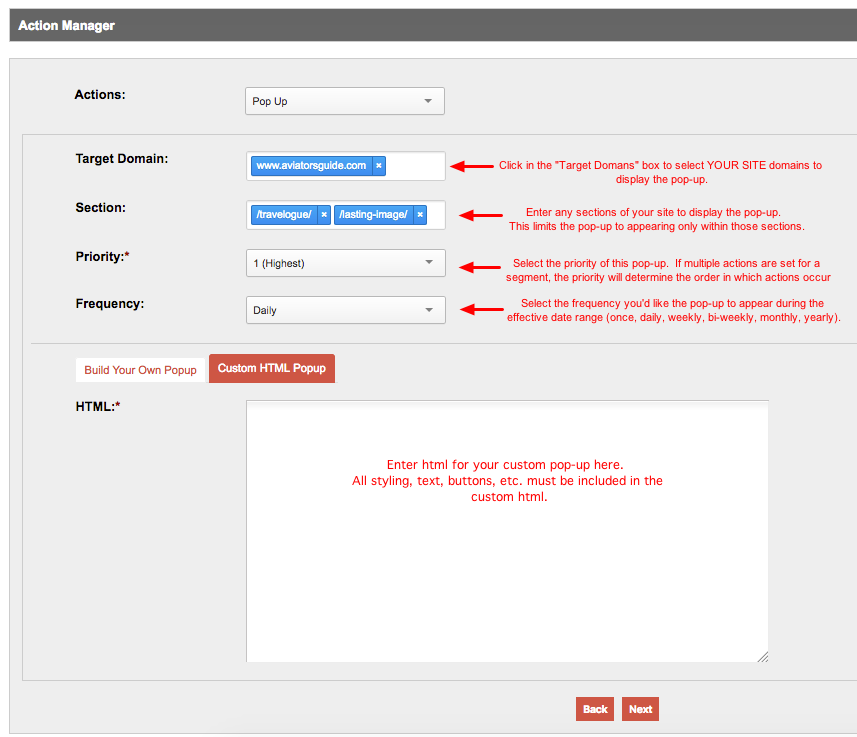 Click "Next" or "Back" to go back and make changes.Review and SaveUpon clicking "Next", you'll have an opportunity to review the action and "Save" or go "Back" to make changes. When a pop-up action is in effect, a pop-up will appear for the specified target segment in the designated domains and sections at the set frequency and priority level.
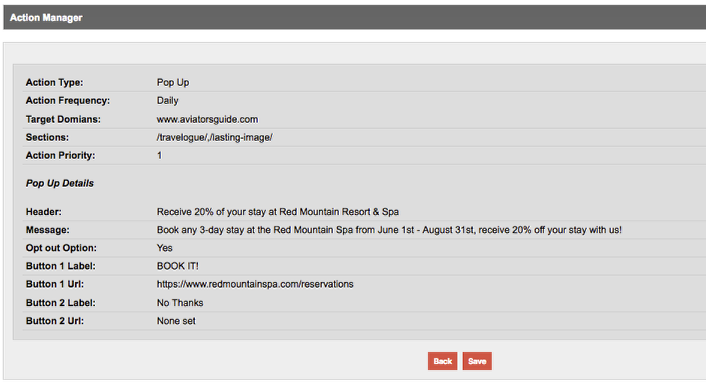
Please see example of the standard ONEcount pop-up below.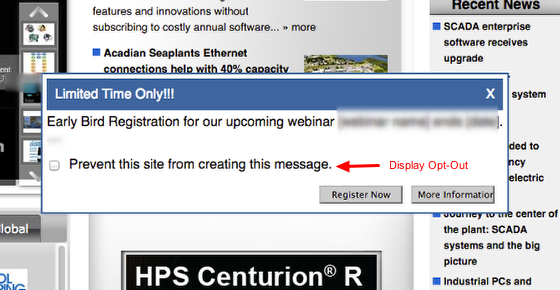
B. Create Redirect
1. Click "New action" and select Redirect.
2. Give the action a name and description (optional).
3. Click "Next".
4. Complete the fields as shown below.
5. Click "Next".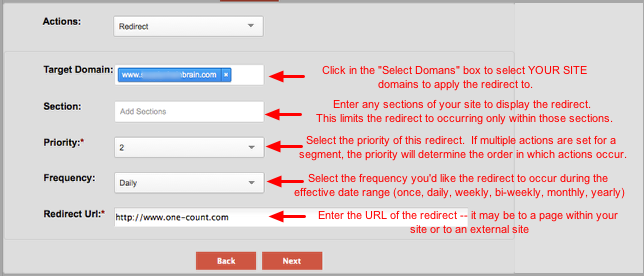
Upon clicking "Next", you'll have an opportunity to review the action and "Save" or go "Back" to make changes.When a redirect is in effect, the redirect will occur for the specified target segment in the designated domains and sections at the set frequency and priority level. There is user no opt-out option for this action.
C. Create Ad TargetIng
For ad targeting to work, the ad code on your site must be updated so that it will accept and process Key and Value variables. If needed GCN will provide you with the correct code.
1. Click "Create Action" and select "Ad target".
2. Give the action a name and description (optional).
3. Click "Next".
4. Complete the fields as shown below.
5. Click "Next".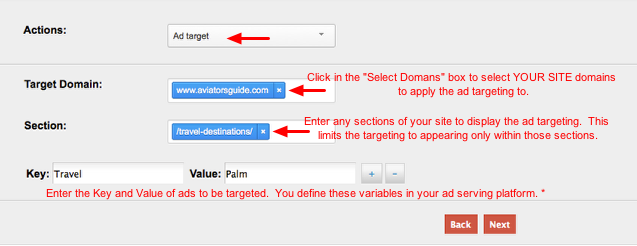 Upon clicking "Next", you'll have an opportunity to review the action and "Save" or go "Back" to make changes.When an ad target is in effect, only those ads specified by Key and Value will display for the specified target segment on the designated domains and sections at the set frequency and priority level. There is user no opt-out option for this action.
In Revive/OpenX, these variables are created under Inventory > Banner > Delivery Options > Add Delivery Limitation > Site-Variable > Add > enter Key and Value variables. These variables are of your choosing and can be text or numbers.
D. Create Email
1. Click "Create Action" and select Email.
2. Give the action a name and description (optional).
3. Click "Next".
4. Complete the fields as shown below.
5. Click "Next".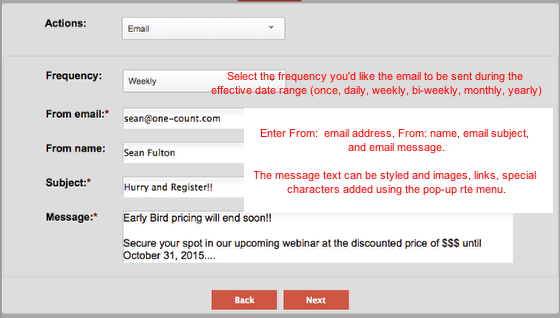 Upon clicking "Next", you'll have an opportunity to review the action and "Save" or go "Back" to make changes.When an email action is in effect, the email will be sent to the specified target segment on the designated domains and sections at the set frequency and priority level. There is user no opt-out option for this action.
Search all Documentation:
Unknown macro: livesearch. Click on this message for details.
Search System UTILITIES:
Unknown macro: pagetreesearch. Click on this message for details.
More System UTILITIES