Key Concepts - Ad Analytics
The Analytics module consists of Website Analytics, Newsletter Analytics, and Banner/Ad Analytics and provides key analytics and insight into subscriber behavior across your online properties.
The Ad Analytics tool allows you to save, view, or download detailed known and unknown impression and viewability statistics.
Ad Analytics includes data pulled from your ad server (OpenX/Revive and DFP Premium/DFP Small Business); data obtained from the ONEcount widget; and, if you use MOAT and have the MOAT pixel placed, viewability data from MOAT.
The following lesson provides general information on using the Ad Analytics tool.
DEFINITIONS
Advertiser - Advertiser(s) pulled from your ad serving platform. (ONEcount currently supports OpenX/Revive and DFP Premium/DFP Small Business.)
Campaign/Order - Banner campaigns pulled from your ad serving platform. (ONEcount currently supports OpenX/Revive and DFP Premium/DFP Small Business.) Alternatively known as a “campaign”, an order is an ad request placed by an advertiser on a publisher’s website. It can be an ongoing or time-bound activity and include multiple ad sizes.
Line Item - In DFP (but not in OpenX/Revive), every order as described above must include at least one line item, which defines the ad to run, which unit it will run in, which creative to use, and details about any custom targeting. When a Summary Report is generated, creatives will display below the Line Open. Because OpenX doesn't include a Line Item level in the heirarchy and there is no drop-down selection option in ONEcount if using OpenX (the drop-down menu will show "default" instead), individual creatives will be displayed below the Campaign.
So, the Ad Analytics Summary Report will display in the following hierarchical order:
DFP – Advertiser, Order/Campaign, Line Item, Creatives (4 levels in Summary Report)
OpenX/Revive – Advertiser, Campaign, Creatives (3 levels in Summary Report)
Known -* A user who is in the ONEcount system and has been authenticated and identified.
Unknown = Includes counts of those users who are not authenticated/have not been identified by the ONEcount system. A user may be in your database but be an unkown if they haven't been authenticated by logging in, clicking on a smartlink in an email, or completing a subscription/registration form for a new product.
Total - Total of both Known and Unknown users.
Served Impressions - Number of ads that have been served, whether in view or not when the web page is loaded. This number is calculated by ONEcount.
Viewed Impressions - Number of "viewable" ads that have been served. This number is calculated by ONEcount.
Per the IAB standards on viewability, an ad is counted as "viewed" when the following criteria are met:
- Pixel Requirement: Greater than or equal to 50% of the pixels in the advertisement are on an in-focus browser tab on the viewable space* of the browser page, and
- Time Requirement: The time the pixel requirement is met is greater than or equal to one continuous second, post ad render.
*Viewable space, per IAB is: Advertisements and content associated with each page load can appear either within or outside the viewable space of the browser on a user's screen - i.e., that part of the page within the browser that a user can see. This is similar to the concepts once referred to as "above the fold" (i.e., within the viewable browser space) and "below the fold" (i.e. outside the viewable browser space).
Visitors Served - The number of known visitors who were served ads, viewable or not viewable per IAB standards. If a visitor is served multiple ads, it is counted as one visitor served.
Visitors Viewed - The number of known visitors who were served ads that meet the IAB standards on viewability. If a visitor is served multiple Viewable ads, it is counted as one visitor served.
Ads Served - The total number of ads served. This number is pulled directly from your ad serving platform. (ONEcount currently supports OpenX/Revive ad serving platform.)
Ads Clicked - The total number of ads served from your ad server. (ONEcount currently supports OpenX/Revive ad serving platform.)
Viewability Rate - Number of Viewed Impressions / number of Served Impressions.
**
Avg. Time in View (in seconds) - The average time ads are in view. Calculated by number of seconds in view / number of Viewed Impressions.
- A user must be authenticated and identified by ONEcount to be counted as a Known user. There are different ways to be identified: 1) By logging into a web site (direct log-in or via a lookup form), 2) by clicking on a smartlink** in an email blast, 3) by completing a registration/subscription form for a product. Once authenticated and identified, a cookie will be set, allowing you to track a user's activities as a Known user. If a user is not logged in/identified, activities will be tracked as an Unknown user. Once the user is authenticated and identified, all of his/her activities (including past activities) will be moved from Unknown statistics to Known statistics.*
IMPORTANT NOTE:
In order to identify users and track activity, widgets must be embedded on every page of your web site (placing them at the root level will accomplish this). These widgets, specific to your site(s), and directions for placement are provided in the Widget Builder. Please see Widget Builder __documentation for moreinformation.
ONEcount Library/Tracker: This javascript snippet controls gating/access, cookie setting and does web tracking.
_Automation Widget: Automation scripts are snippets of javascript code that allow ONEcount to target actions (like ad target, popup target etc). This piece of javascript determines and outputs any automated action to the browser. _
_Noscript Tag: A noscript tag is needed to track requests when js is disabled. _
_Banner Trackers: Banner widgets are used to track and report banner activity. There are two banner platforms supported within ONEcount: OpenX and DFP (Premium and Small Business). _
_ Third Party Trackers Modifications: Usually websites will have third party trackers like Google Analytics, etc. installed on their website. A small piece of code needs to be added to those third party trackers so that ONEcount can pass the original referrer to those systems. We provide the code that needs to be added to your Google analytics code. If any other third party trackers are being used on your website, please let your ONEcount account manager know ahead of time. _
_ONEcount Pixel for Moat: ONEcount can collect ad viewability data from Moat's realtime pixel. In order to send data to ONEcount, Moat can fire a pixel like below to send data to ONEcount. _
OPEN THE BANNER ANALYTICS WINDOW
Select ANALYTICS & DASHBOARD from the main menu.
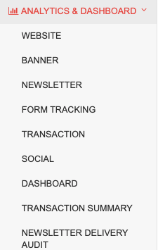
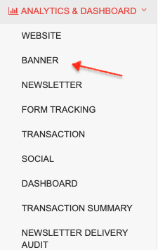
Select BANNER from the sub-menu.
This will bring you to the Ad Analytics main window, as shown below.

OPTIONS FOR SELECTING CRITERIA

Note that clicking on "Get Report" without making any selections for site, advertiser, campaign/order, line item will generate a summary report of ALL sites, advertisers, campaigns/orders, and line items.
Date Range

Date Range defaults to current date as end date and one week prior as start date. Keep at default range or change by clicking in the date range field and using the drop-down calendar to select the desired range. To set the range, click on the desired start and end dates on the calendar then click Apply. Note the options to the right of the calendars: Last 7 Days, Month to Date, Previous Month, Year to Date.
Select Site

Clicking in the "Select Sites" field will present a drop-down of domains on which to run analytics. Click on a domain(s) to select it or "Select All" for all domains.
The sites that appear in this list are configurable in the Config Manager.
Select Advertiser

Clicking in the "Select Advertiser" field will present a drop-down of advertisers from your ad server. Click on an advertiser to select it or "Select All" for all advertisers.
Select Campaign/Orders

Clicking in the "Select Campaign/Orders" field will present a drop-down of campaigns/orders from your ad server. The campaigns/orders presented will be campaigns only for the advertiser selected in the previous step. Click on a campaign/order to select it.
Get Report
When the date range is selected and all selections made, Click the "Get Report" button. This will load the analytics report on the page. (See example below.)
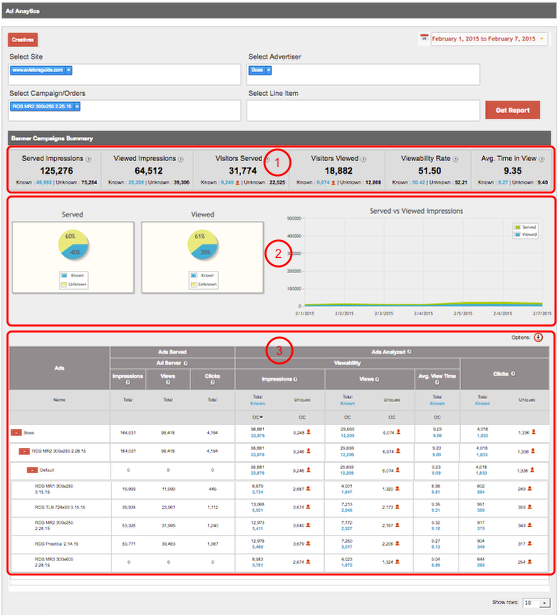
The Summary Report displays in three main sections:
1) Aggregate data for all selected advertisers and campaigns
2) Charts/graphical representation of key data
3) Breakdown and detail of aggregate data
The Summary Report breaks out applicable metrics by Known, Total, and Unknown.
SHARED REPORT FEATURES, ICONS, AND OPTIONS (ALL TABS)
The features and options described below are available for each of the three summaries (Resources, Banner Campaign, and Newsletter Campaign).
Show Rows
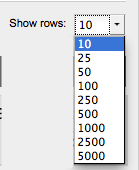
The default number of rows shown is 10. Use the drop-down menu to display more than 10 rows (up to 5,000).
You should select the appropriate number of rows to display whether or not you use either of the options described below (Refine Report, Download Report).
User Data Analysis

Clicking on this icon will bring you into the List Wizard where you can download the list of Known users, filter/segment the list further, and/or perform various administrative actions on the list. (See List Wizard documentation for more information on functionality.)
Information

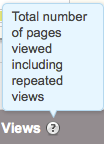
Clicking a " ? " in any table column heading will bring up a pop-up explaining the heading label. (See example below.)
Options
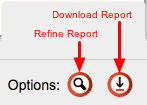
Refine Report
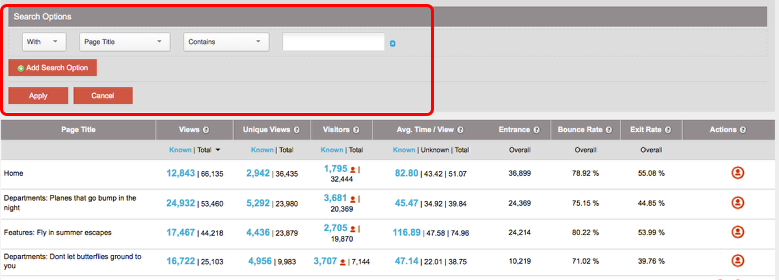
You can refine/filter your report by using the following search options and entering the value in the blank field:
With / Without > Page Title > Contains / Matches / Matches Exactly / Begins With / Ends With
With / Without > Views / Unique Views / Avg. Time on Page > Total / Known / Unknown > Equals / Greater Than / Less Than
With / Without > Entrance / Bounce Rate / Exit Rate > Equals / Greater Than / Less Than
For example, if you want to refine the report in the screenshot above to show only those resources/pages that begin with the word "Department" and that have 10,000+ Known page views, you would use the following options:
With > Page Title > Begns With > Departments
With > Page Views > Known > Greater Than > 10000 > Apply (See below.)
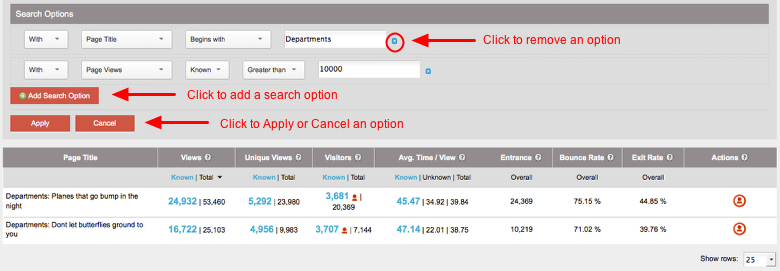
You may add multiple search options by clicking on the "Add Search Option" button. Multiple search options are joined by AND logic.
To remove an option, click on the blue "x" the right of the value field.
Note: When options are removed or cancelled, you must click on "Apply" again to refresh the report.
Download Report

Downloading a report will download the report, as it is displayed, in .csv format.
If 25 rows are displayed, those 25 rows will be downloaded; if 50 rows are displayed, those 50 rows will be downloaded, etc.
Known | Unknown | Total
Known = Includes users in your database who have been identified and authenticated by ONEcount.
Unknown = Includes counts of those users who are not authenticated/have not been identified by the ONEcount system. A user may be in your database but be an unkown if they haven't been authenticated by logging in, clicking on a smartlink in an email, or completing a subscription/registration form for a new product.
Total = ** Known + Unknown counts
Search all Documentation:
Unknown macro: livesearch. Click on this message for details.
The [livesearch] macro is not in the list of registered macros. Verify the spelling or contact your administrator.
Search ANALYTICS Documentation:
Unknown macro: pagetreesearch. Click on this message for details.
The [pagetreesearch] macro is not in the list of registered macros. Verify the spelling or contact your administrator.
On this page:
More ANALYTICS Documentation:
Click here to expand...
Web Analytics
Ad Analytics
Email/Newsletter Analytics
Key Concepts - Email/Newsletter Analytics
Running Email/Newsletter Analytics
Form Tracking Analytics
Running Form Tracking Analytics
