Products - How to Create a Product
The directions below provide detail on how to create a new Product. Once a Product is created it can be attached to a Package.
Products may be created in the Products tool (as described in this lesson) prior to being attached to a Package, or they can be created during the Package creation process. Please refer to Packages - How to Create a Package Part 3: Attach / Remove / Create a Product for details creating Products during the Package creation process and attaching to a Package.
Please refer to the Quick Start Guide - Products for information on basic concepts and rules relating to Packages, terms, and Products.
CREATE A NEW Product
There are four different types of Products: File, Newsletter, Page, and Section. Details on each type of Product are given below.
1. Select SETUP from the main menu.
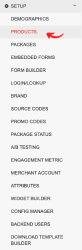
2. Select Products form the SETUP sub-menu.
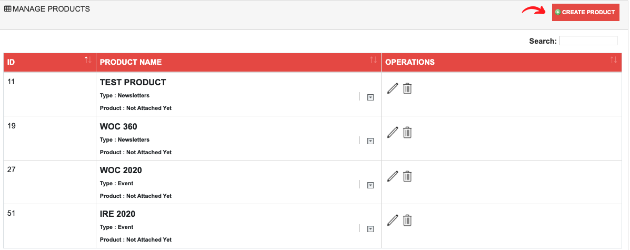
This will open the Products listing page, where all existing Products are listed in alphabetical order. Note the Search and page-through functionality.
3. Click "Create New Product" found in upper right of the Product list. This will open the New Product window.
4. Enter a title and description for the Product.

The title should be as brief but descriptive as possible. For example if the Product is a newsletter, the title could be the name of the newsletter; or if the Product is access to a video series, then the title could be the name of the video series.
5. Select the type of Product (File, Newsletter, Page, Section).
Further detail on the different types of Products is given below.
Product Type: File
To restrict access to a file and/or identify it for a dashboard, such as a specific whitepaper or other document select Product Type: File.
When you select "File" from the "Product Type:" drop-down menu, you will see the message “Files in the root folder directory can be protected from unauthorized downloads”.
1. Under "Choose File" select the file you wish to restrict access to.

The directory tree of your root folder will be displayed, and you can select your file here.
2. Click "Save", and the file-type Product will be saved.

You will receive a confirmation message, as shown above, indicating the time the Product was saved.
To return to the Products listing page, which will show your new Product in the alphabetical list, click on the Go Back button.
Note: You may cancel Product creation by clicking on the Go Back button before clicking Save. Doing so will bring you back to the Products listing page without creating a Product.
Product Type: Function
Gating is currently done based on the a REGEX match of a url segment on page load. This function is designed to allow customers to gate content where gating can not be sufficiently managed using URL segments or where content must be gated without a page load.
The Function-type Product works in conjunction with ONEcount's javascript widgets, and it expects one parameter which is the numeric Product id. The ProductId is required. Product Ids are available in ONEcount on the Product listing page.
For more information on ONEcount javascript widgets and their functionality, see the ONEcount Javascript Widgets and ONEcount Javascript Widget Changes sections.
1. Select "Product Type:" of Function and enter a text return value in the Value field.

The text return value is currently ignored, but it may be used to trigger gating in the future.
Save the Product
- Note that the users entering from the following referrers will be bypassed: Bing, Google, Facebook, Twitter, LinkedIn. i.e. if a user comes to an article from one of these referrers they'll be granted access. If they click on another article link, they'll then be required to register. This can be disabled, but doing so may prevent bots from indexing.
- You can use the Function-type Product in conjunction with a free pass, i.e. any non-registered/logged in user can view x articles before having to register for the "Article Access" Package. After registering for the "Article Access" Package, if you've enabled the access frequency the user will be able to view x articles in n timeframe before being required to subscribe to a paid Package/package.
Save the Product.
2. On the template of the page(s) you wish to gate/identify, add the following ONEcount function: GCN.onecount.gate(Productid)
For example, if the function-type Product ID is 25, the js function would be GCN.onecount.gate(25)
The Product id of the Function-type Product you created is required.
You can place this anywhere on the template.
Product Type: Newsletters
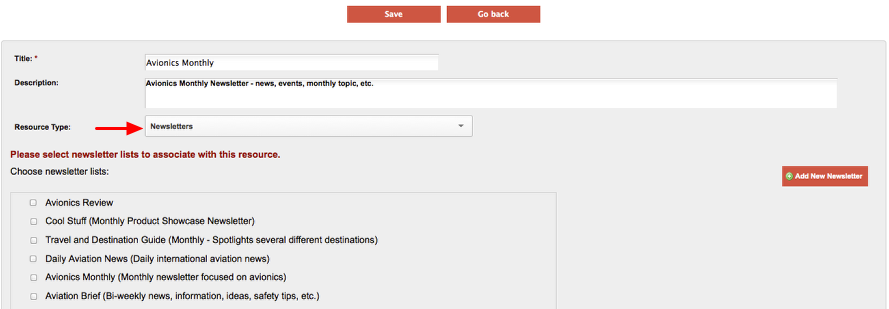
To create a Newsletter-type Product and a newsletter list in the Email Engine, select Product Type: Newsletters.
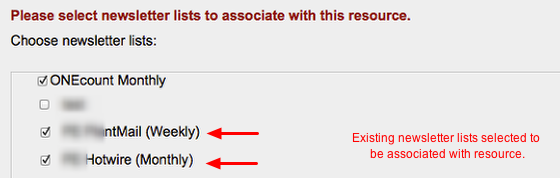
When you select "Newsletters" from the "Product Type:" drop-down menu, you will see the message "Please Select Newsletters to associate with this Product" with a drop-down check box list of all existing newsletter lists (called subscriber lists the Email Engine). This list of Newsletters shows all of the existing newsletter/subscriber lists that reside in the EMail Engine.
*If using the Email Engine to manage your newsletter/email lists, when a newsletter Product is created, ONEcount will automatically create a newsletter list in the Email Engine. When users submit the subscription form for the Package with the newsletter Product, they will automatically be placed on the newsletter list in the Email Engin. Their demographic and subscription data will also be added the ONEcount database. If you are using a different email marketing provider (such as Magnet Mail or Silverpop), please check with GCN to verify if an API is available.
The Product must be created and attached to a Package prior to an import or user subscription via an online form. ONEcount won't push Package subscribers to a newsletter Product created after the user subscribed to a Package (either through import or user action).
1a. To associate the Newsletter Product with an existing Newsletter list that has been created in the Email Engine, check the box beside the newsletter list(s) you wish to associate with the Newsletter Product.
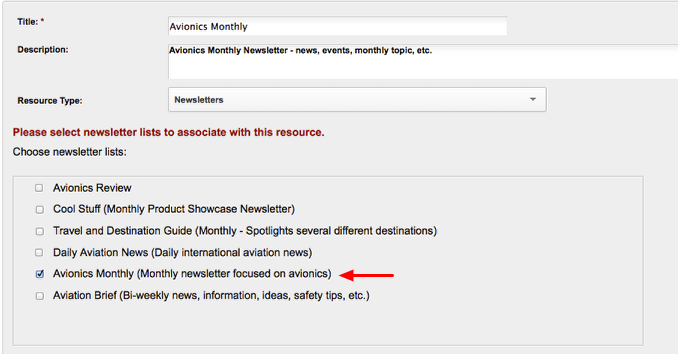
You can select the newsletter(s) you wish to associate with the Product - and by extension with the Package - or create a new Newsletter list (subscriber list).
When you create a new Newsletter-type Product you, in effect, create a new, empty list in the Email Engine that is associated with the Newsletter Product.
A newsletter Product may have more than one list associated with it. For example, you may have a newsletter Package/Product where a user can sign up to receive multiple newsletters (sent on different schedules, e.g. one weekly and one monthly) as part of a bundled package. In such an instance, you could attach more than one newsletter list to the Product, and when a person subscribes to the Package/Product, he/she will be placed on both newsletter lists.
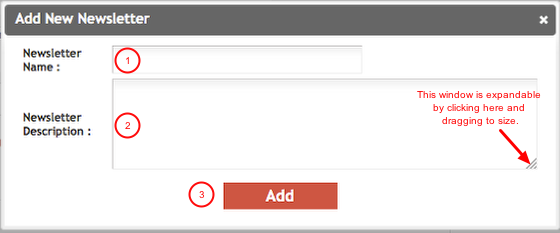
1b. To create a new newsletter list in the Email Engine, click on +"Add New Newsletter" link.

2b. Enter the Newsletter List Name (1) and Description (2) then click "Add" (3).
You will see the newly created newsletter list, with a check mark, at the top of the newsletter list, as shown below.
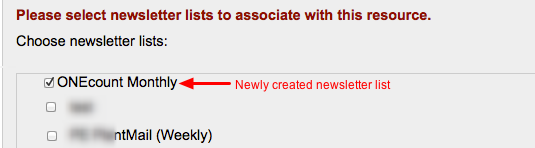
Select any other newsletter lists (if any) you wish to associate with this Product, as shown below.
3b. Click the "Save" button, and the newsletter list will be saved.
You will receive a confirmation message, as shown above, indicating the time the Product was saved.
To return to the Products listing page, which will show your new Product in the alphabetical list, click on the Go Back button.
Note: You may cancel Product creation by clicking on the Go Back button before clicking Save. Doing so will bring you back to the Products listing page without creating a Product.
Product Type: URL
To restrict access to a web page on your site and/or identify it for a dashboard, select Product Type: URL.
When you select "URL" from the "Product Type:" the Edit Product screen will change to give you some additional options which we will discuss here.
First, give you product is a Title. This is what will appear on any gating or subscription forms on your site, and on all internal, ONEcount menus where this product is listed.
If you would like an image displayed on forms using this product, put a link to the image in the Image URL box. For example, if the product is for a web-site or print product, you can put a link to the cover-image of the product in this box.
Primary Form or Landing URL: This box is important. This tells ONEcount what form to present when a user clicks on the URLs covered by this product. If you are using a ONEcount form to register or subscribe users, then choose "Form" from the pull-down and then select the appropriate form from the pull-down on the right. If you are connecting to a different registration system to register or subscribe users, choose URL, and enter the URL you want the user directed to in the box on the right.
***IMPORTANT NOTE: If you are directing users to a third-party site for gating, you will need to make sure that that site or form enters a subscription for the user into the ONEcount API before returning the user to the site ONEcount is gating. Failure to submit that transaction will cause the user to get caught in a loop, because if the user is not subscribed to the asset, they will be sent to the form defined here.
***IMPORTANT NOTE: If you will be using ONEcount to Gate the content on this URL using a registration or Paywall, change the Gating option to YES. NOTHING ELSE IS REQUIRED TO GATE THIS URL. IF YOU TYPE THE URL OF YOUR WEB SITE INTO THE URL BOX, IT WILL BE GATED WHEN YOU SAVE THIS PRODUCT!
***REALLY IMPORTANT NOTE: MAKE SURE YOU HAVE THE CORRECT URL AND HAVE SET UP A FORM FOR THIS PRODUCT PRIOR TO TURNING GATING ON. FAILURE TO SET UP A FORM WILL SEND USERS TO AN ERROR PAGE.

Free Pass: If you set this option to "Enable," ONEcount will provide a box where you can determine how many free views of this URL a user may have before being forced to register or subscribe. Free pass is a number and a time period, such as 1 per week, 3 per month, etc. Setting a number and choosing Unlimited means ONEcount will only allow the user the specified number of views forever.
The Free Pass option is cross-device, meaning if a user visits once on their desktop computer and once on their mobile phone, ONEcount will count that as two views.

If you are charging for access to this URL and have configured ONEcount for your Merchant Services provider, you may enter a price for access to this URL. Please note that this is a one-time payment. If you would like to charge an amount for a specified period of time, please visit setting up Packages in this documentation.

Now enter the URLs or URL fragments you would like protected. ONEcount uses a REGEX string match to match the URLs in the product against the URL in the user's web browser. You may enter any number of URLs or URL fragments into a single product, just click the plus sign next to the URL to add a new URL.
Note that ONEcount uses a string match, so in the example above, the fourth line will match ANY URL on ANY site if the URL contains /Chicago-Farmer/, while the third line will only match URLs on the site www.farmprogress.com that are in the /Chicago-Farmer section of the site. Be careful of sites that can be accessed by http or https, and sites that do not require the www host name. These will require a more general version of the URL, such as farmprogress.com/Chicago-Farmer.
Once you have entered the URLs for this product, you can save it.
2. Click "Save", and the Product will be saved.

You will receive a confirmation message, as shown above, inidicating the time the Product was saved.
To return to the Products listing page, which will show your new Product in the alphabetical list, click on the Go Back button.
Note: You may cancel Product creation by clicking on the Go Back button before clicking Save. Doing so will bring you back to the Products listing page without creating a Product.
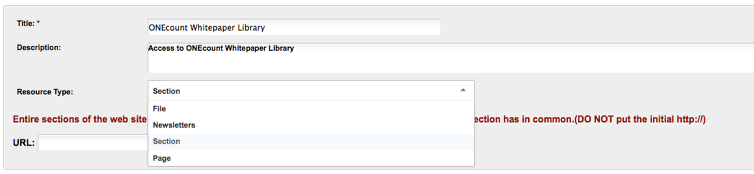
Product Type: Section
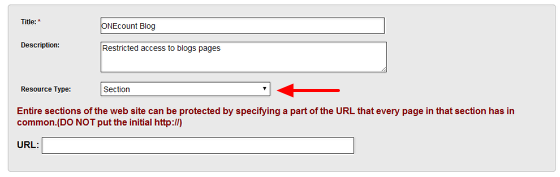
To restrict access to an entire section of your site and/or to identify it for a dashboard, select Product Type: Section.
When you select "Section" from the "Product Type:" drop-down menu, you will see the message “Entire sections of the web site can be protected by specifying a part of the URL that every page in that section has in common. (DO NOT put in the intitial http://)"
1. Enter the part of the URL that every page in the section has in common.

This will restrict access to all pages to access whitepapers in the gcnmedia.com site. (The URL that all pages have in common is the highest level page in the page hierarchy – all sub-pages below "/whitepapers" will be restricted, e.g. onecount/whitepapers/whitepaper1, onecount/whitepapers/whitepaper2, etc.)
2. Click "Save", and the section-type Product will be saved.

You will receive a confirmation message, as shown above, inidicating the time the Product was saved.
To return to the Products listing page, which will show your new Product in the alphabetical list, click on the Go Back button.
Note: You may cancel Product creation by clicking on the Go Back button before clicking Save. Doing so will bring you back to the Products listing page without creating a Product.
ATTACH Product TO A Package
Please refer to Packages - How to Create a Package Part 3: Attach / Remove / Create a Package for directions on how to attach a Product to a Package.
On this page:
More INVENTORY Documentation: