Import - How to Use an Import Mapping Template
This lesson describes how to use an existing Import Mapping Template to expedite the import process. Detailed instructions on importing a file into the ONEcount system are found in the "How to Import a File" lesson.
Please refer to Quick Start Guide - User Operations for important information about basic concepts and rules relating to imports and bulk operations.
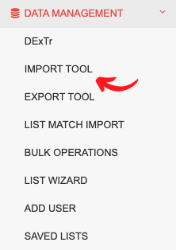
OPEN THE "DATA MANAGEMENT" WINDOW
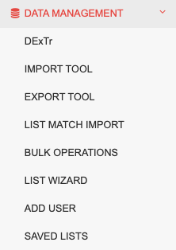
Click on "Import Tool".
This will open the Import window, as shown below.

LOCATE AND SELECT A MAPPING TEMPLATE
1. In the Import window choose your import file using the "Browse" button (1), and select "Upload File" (2).

The list will be uploaded, and the Import window opened. You will see a confirmation that the list was uploaded successfully, along with the number of records uploaded. (See screen shot below.)
The list has not been imported at this point but uploaded to the system in preparation for import.
2. Give your import an Import Title (1), Import Description (2), select a Source Code (3), select the product(s) from the Product List (4), and select a product status..

Note that the product terms are what appear in the list of products (#4 above) in the Import Engine. Because all products have a term(s) and if a product has multiple terms (i.e. a free print subscription and a paid print subscription), each term needs to appear in the "product" list so that a user can be subscribed to that specific term.
3. Below the Product List, you will see a list of any existing Import Mappings (templates). Find the template you wish to use and select "Use".

Note that prior to selecting "Use", there is no mapping in the mapping section below the template list (Active Question and Active CSV headers are blank.)
If the .csv import file you are using does not contain fields that are saved in the mapping template, those fields will be ignored and you will receive a notification as shown below. If you wish to ignore those fields – or add any of them after selecting the template – continue with the mapping, click OK.

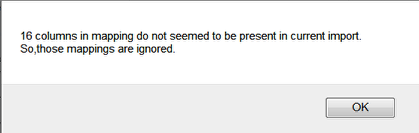
If there are many fields mapped to the Mapping Template but not present in the import file, a message displaying the count of fields not present and not a complete listing of the fields will be displayed, as shown below.
If you wish to ignore those fields – or add any of them after selecting the template – continue with the mapping, click OK.
4. Active Question Headers and Active CSV Headers will be automatically populated based on the import mapping template.
You may add additional fields to be mapped at this point and either save as a new template or continue with the import. (See screenshot below for directions on how to map additional fields.)
- If you add/remove fields to map and don't wish to save as a new template, continue with steps 5-7 below.
- If you add/remove fields to map and wish to save as a new template, follow steps 4-7 in the "How to Create an Import Mapping Template" lesson.
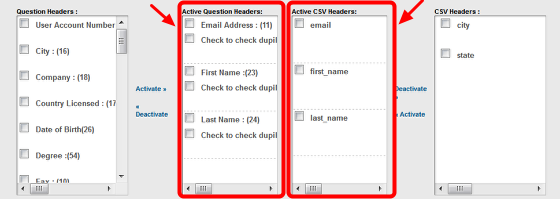
To map additional fields:
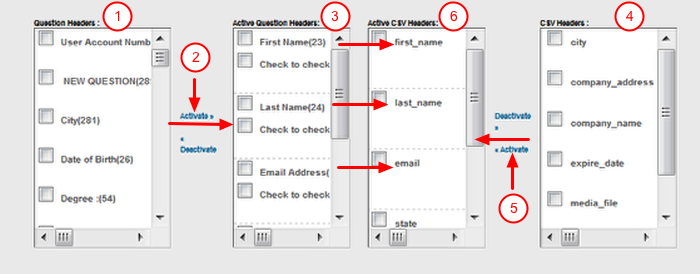
- Select data fields/questions to map from the ONEcount database (1) then select "Activate" (2). Selected questions/data fields will appear in the "Active Question Headers" column (3). (Move from left to right.)
- Select the data fields/columns to map from the CSV import file (4) then select "Activate" (5). Selected data fields/columns will appear in the "Active CSV Headers" column (6). (Move from right to left.)
To move more than one field at a time into the "Active Header" box, select multiple fields then click on "Activate".
To remove a field from the Active column, select the field and click on "Deactivate". Be sure to remove the same field from the other Active column.
When mapping fields, Active Question Headers and Active CSV Headers must match, ie the fields must be in the same order. (See purple arrows in screenshot above.)
Question Header and CSV Header field names don't need to be identical, e.g. a Question Header may be "Email Address" and CSV Header "Email".
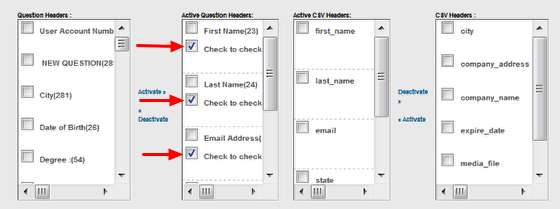
If you plan on completing an import after modifying the template, select field(s) against which to check for duplicates.
More detail on importing a .csv file and mapping headers can be found in the "How to Import a File" lesson.
5. Select fields to check duplicates against.
6. Set Request Date field, Expiration Date field, and Media Files fields (all optional).

Select the column in your import file to set the Request Date (1), select expiration date field to specify expiration date (2), select the column with media file filenames/paths to link media files (3).
7. Review mapping and selections, then click "Set" at the bottom of the page.

When "Set" is clicked on, the three buttons below will appear.
8. Click "Import".

9. This will bring you to the Pre-Import Summary and Sample Mapping page. Continue your import as usual.
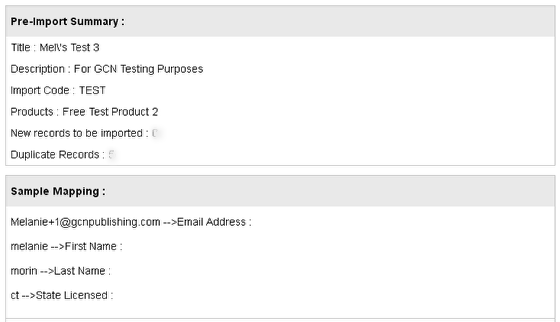
For detailed instructions on how to import a file into the ONEcount system, see the "How to Import a File" lesson.
Search All Documentation:
Unknown macro: livesearch. Click on this message for details.
Search USER OPERATIONS Documentation:
Unknown macro: pagetreesearch. Click on this message for details.
More USER OPERATIONS Documentation